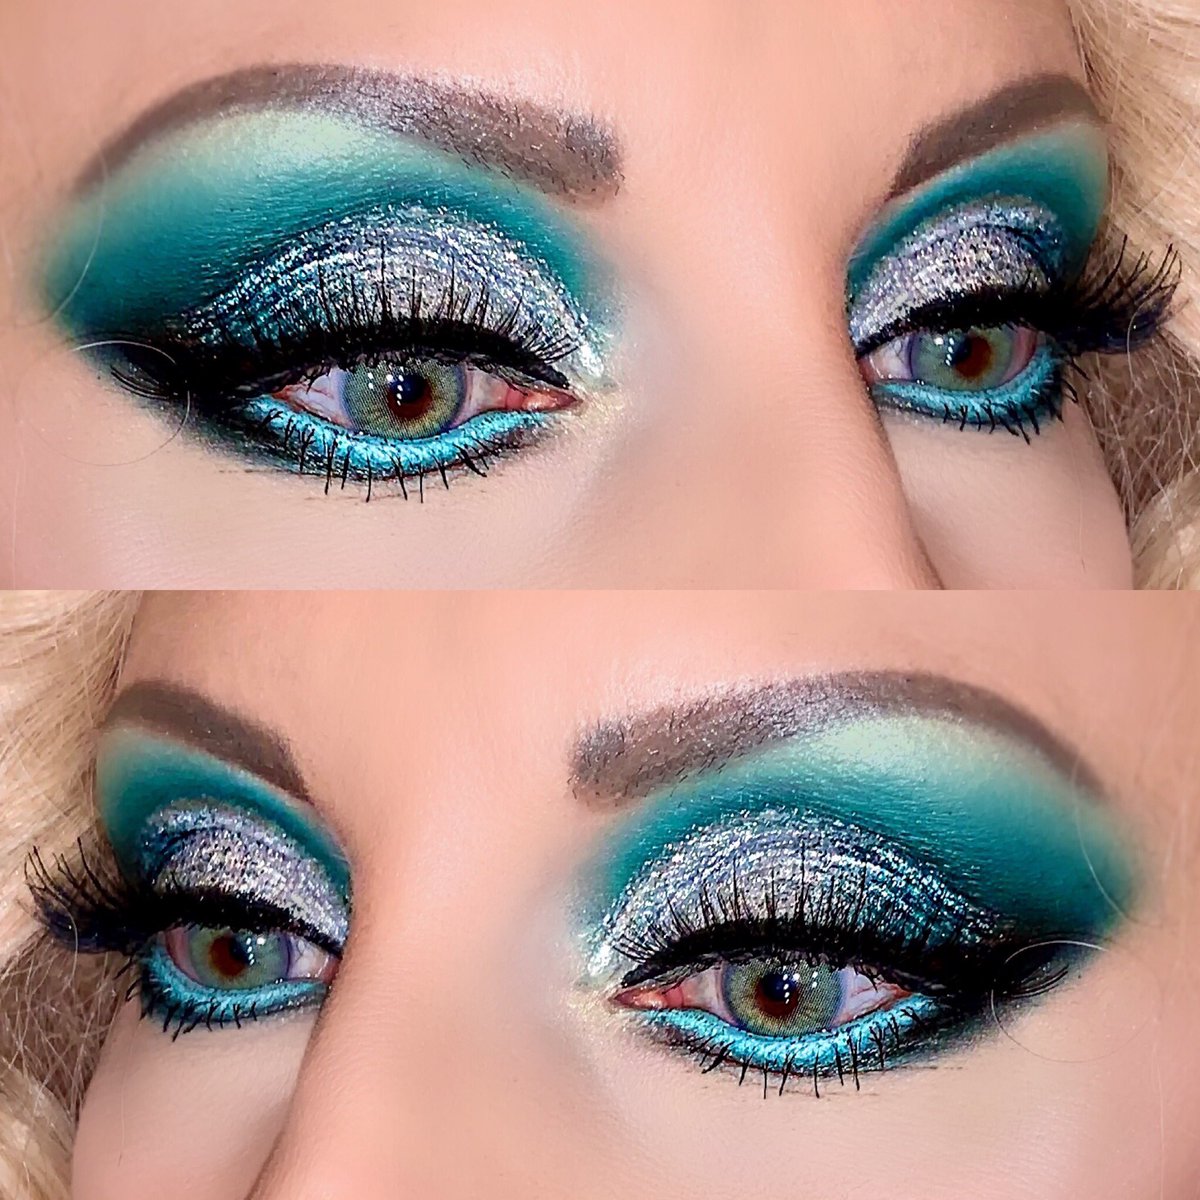
Introduction to Luxe Makeup Looks
Overview of Revolutionary Makeup Techniques
As someone deeply fascinated by the transformative power of makeup, I’ve watched closely as the industry has introduced revolutionary techniques over the years. These innovations have not only made application easier but also allowed for more creativity and personal expression.
– **Airbrush Makeup**: Once reserved for high-end photo shoots and movie sets, airbrush makeup has entered the mainstream. It provides a flawless, seamless finish that feels light on the skin.
– **Contouring and Highlighting**: Sculpting the face with light and shadow has become an essential skill. The right placement can accentuate features and create a more defined look.
– **Baking**: This technique involves applying a heavy amount of translucent powder over foundation and concealer, letting it sit, and then brushing it off. It results in a creaseless, porcelain-like finish.
– **Multipurpose Products**: The rise of multi-use products has been a game-changer. Now, a single item can often be used for cheeks, lips, and eyes, making a luxe look more accessible.
– **Digital Color Matching**: Cutting-edge technology in stores helps find the perfect foundation shade, ensuring a natural and cohesive makeup look.
The Evolution of Luxe Makeup Trends
Luxe makeup trends have continuously evolved, often encapsulating the spirit and fashion of their times. They reflect both cultural shifts and technological advancements.
– **1920s**: The bold flapper looks with dark, smoky eyes and red lips symbolized liberation.
– **1950s-1960s**: Hollywood glam with winged eyeliner and matte complexions dominated, thanks to screen sirens like Marilyn Monroe and Audrey Hepburn.
– **1980s**: This era celebrated excess with bright eyeshadows, bold blushes, and dramatic lip colors.
– **2000s**: The early 2000s veered towards a more natural aesthetic, but with the advent of social media, makeup trends became more diverse and global.
– **Today’s Trends**: The modern luxe makeup look is all about a flawless base, often with a dewy finish, complemented by strategically placed highlights and a preference for bolder, statement lips or eyes.
In these modern times, the availability of high-definition cameras and social media platforms has raised the stakes for a luxe makeup look. Everyone can now access information and tutorials to create intricate and glamorous looks that were once the province of professionals. The fusion of classic techniques with innovative products continues to push the boundaries of what is possible in the world of makeup. Luxe makeup isn’t just about the products used; it’s the embodiment of an art form that empowers and enhances personal style.
Base Perfection: Achieving a Flawless Foundation
Innovative Foundation Application Methods
As someone who constantly seeks perfection in my makeup routine, I’ve tried an array of application techniques to achieve a flawless foundation base. Below are some of the innovative methods that have become integral to my makeup process:
– **Beauty Blender**: Utilizing a damp beauty blender has been a game-changer. Its unique shape allows me to blend foundation seamlessly into the skin, particularly around the contours of my face and under the eyes.
– **Brush Work**: The use of synthetic brushes allows for a streak-free application. I’ve found that flat brushes are great for an even foundation layer, while stippling brushes help in achieving an airbrushed finish.
– **Silicone Applicator**: A relatively new addition to my arsenal, a silicone sponge doesn’t absorb any product, proving economical and hygienic. It works wonders for a full-coverage look.
– **Finger Application**: Sometimes, I revert to the warmth of my fingers to press the foundation into my skin gently, especially when I’m seeking to look natural with minimal coverage.
Each method has its unique benefits, and I often find myself combining them depending on the desired finish and the foundation formula I am using.
The Role of Primer and Setting Products in Luxe Makeup
For a luxe makeup look that lasts throughout the day, I ensure that I don’t overlook the critical supporting players: primer and setting products. Here’s how I incorporate them into my regimen for a lasting flawless foundation:
– **Primer**: Before applying foundation, a primer serves as the perfect canvas. A silicone-based primer fills in fine lines and pores. If my skin feels dull, I opt for an illuminating primer for an extra burst of radiance.
– **Setting Powder**: Translucent setting powder is a staple. I apply it to areas prone to creasing or shine, like under the eyes and the T-zone. It helps to lock in foundation and prevents it from sliding off.
– **Setting Spray**: A mist of setting spray not only melds all layers of makeup together but also adds hydration. And, for occasions that demand longevity, I choose a matte formula that withstands the elements.
Balancing the trio of foundation, primer, and setting products assures me that my makeup will look impeccable and endure any event or busy day. Each step, from prepping my skin with primer to sealing my foundation with a setting product, is essential for a base that looks as fresh in the evening as when first applied in the morning.
Contouring and Highlighting: Sculpting the Face Like a Pro
Advanced Contouring Techniques
I’ve always been fascinated by the transformative power of contouring. Here are some advanced techniques I use to sculpt my face like a professional:
– **Cream over Powder**: After applying foundation, I use a cream contour to define my features before setting with powder. This layering creates a more natural contour that mimics skin texture.
– **Mapping Out**: I sometimes sketch a blueprint of where I’ll place my contour and highlight before blending. Doing so allows me to tailor my application to the specific structure of my face.
– **Tailored Tools**: I choose brushes selectively—angled brushes for precise contouring and fluffy brushes for diffusing product. The right tools can make a significant impact on the outcome.
– **Custom Color Mixing**: I occasionally mix different shades of contour product to match my undertone perfectly. This personalized approach prevents the contour from looking too warm or too grey on my skin.
When I first started contouring, it was a little daunting, but through practice, I have learned how much product to use and where to place it to enhance my natural features subtly. Over time, I’ve evolved my technique to what I consider professional standard—achieving a sculpted look that remains soft and natural.
Highlighting Tricks for a Radiant Glow
Moving on to highlighting, I’ve honed several tricks to achieve that sought-after radiant glow with minimal effort:
– **Layering Textures**: I often begin with a liquid highlighter for a dewy sheen and layer powder highlighter on top for extra radiance. This combination ensures that my skin looks luminous in any light.
– **Strategic Placement**: I apply highlighter not just on the high points of my cheeks but also on other strategic areas—brow bones, the bridge of the nose, Cupid’s bow, and sometimes a dab in the center of my eyelids for a subtle pop.
– **Subtle Shimmer**: I’m careful to select highlighters with fine shimmer rather than chunky glitter. The goal is to mimic a natural glow rather than a sparkly effect.
– **Blending into Blush**: I meticulously blend the edges of my highlight into my blush to prevent any harsh lines. This seamless transition ensures a cohesive look and adds dimension to my makeup.
Highlighting, when done correctly, can accentuate my best features and give my skin an effortless glow. I’ve found that the key is restraint; a light hand and the correct placement can do wonders for my overall makeup look. Whether I aim for a sun-kissed finish or a soft morning radiance, these highlighting techniques are integral in my makeup routine.
Luxurious Eye Makeup: Blending and Shading
Mastering the Art of Eyeshadow Layering
In my journey to perfect the art of makeup, eyeshadow application stands as a true testament of skill. Mastering eyeshadow layering is crucial to creating depth and intrigue for the eyes. I practice the following steps meticulously:
– **Base Shadow**: I begin by sweeping a neutral base shadow across my entire lid. This silky layer serves as a smooth base for blending and enhances the longevity of the colors applied on top.
– **Transition Shade**: Picking a shade slightly darker than my skin tone, I gently blend this color into the crease. This transition shade is pivotal for creating a gradient that appears effortlessly natural.
– **Crease Deepening**: To add definition, I select a darker shade and focus this on the outer corner and into the crease of my eye. With careful blending strokes, I ensure there are no harsh lines.
– **Lid Pop**: For a pop of brightness, a shimmer shade applied to the center of the lid catches the light beautifully and adds dimension.
– **Highlight**: Lastly, a touch of a light, shimmering shadow beneath the brow bone and on the inner eye corner opens and lifts the entire eye area.
The intricacy of layering is like painting; it’s about building color and light to create a harmonious composition on the eyelids.
Creating Dimension with Transition Shades
Transition shades are the unsung heroes of eye makeup. They may not be as conspicuous as a bold shimmer or as striking as a jet-black liner, but they are essential for achieving a sophisticated, dimensional look.
– **Choosing the Right Shade**: For my transition color, I select a matte shade that is one to two shades darker than my skin tone. This ensures a subtle yet effective contrast.
– **Blending**: With a fluffy blending brush, I work the transition shade into and just above the crease. It’s vital to use windshield wiper motions for a seamless blend.
– **Layering**: Depending on the look I am aiming for, I may layer additional tones to build depth, each shade darker than the previous and concentrated more narrowly in the crease area.
– **Custom Blending**: On occasion, I’ll mix two shades to create a custom transition color that complements the overall look and enhances the natural contour of my eye.
The mastery of using transition shades is all about subtlety and knowing exactly where to place them to enhance the natural eye shape. It’s these finesse touches that turn everyday eye makeup into a luxurious statement.
Bold and Beautiful: Statement Eyeliner and Lashes
Revolutionary Eyeliner Styles
I think of eyeliner as the exclamation point of my eye makeup routine. The bold precision it provides can truly revolutionize a look. Here are the techniques and styles I embrace to make my eyes stand out:
– **Winged Liner**: The classic cat-eye never goes out of style. I start by sketching a thin line from the inner corner and then create a winged tip that follows the upward curve of my lower lash line. This lifts and elongates my eyes, adding a touch of drama.
– **Tightlining**: For a subtle yet powerful effect, I press the liner into the base of my lashes to fill any gaps. This technique, known as tightlining, defines the eyes without appearing overly made up.
– **Graphic Liner**: When I’m feeling adventurous, I play with graphic liner designs. Whether it’s a double wing, a bold swipe across the crease, or a geometric shape, graphic liner adds an artistic edge to my look.
– **Waterline Pop**: Adding a bright or nude pencil on the lower waterline can instantly brighten tired eyes. I choose a waterproof pencil to ensure it stays put all day.
– **Smudged Smokey Eye**: Sometimes, I opt for a softer, smudged eyeliner look. By smudging a pencil liner along my lash line and blending it out, I create a sultry, smokey effect that’s perfect for evening wear.
These liner styles are versatile. With a steady hand and the right products, they are adaptable for any occasion, making my eyes the focal point of my face.
The Secret to Show-Stopping Lashes
Lashes can truly transform the eye area. Here is how I add show-stopping volume and length:
– **Priming the Lashes**: Similar to prepping the skin, I apply a lash primer to bare lashes. This step helps to bolster the volume and longevity of my mascara.
– **Mascara Layering**: I go in with the first layer of mascara right after the primer, focusing on the root to create volume. I wait a few seconds before applying a second coat for added length and separation.
– **False Lashes**: For moments when I want extreme impact, false lashes are the go-to. I choose a style that complements the shape of my eyes and apply them as close to the lash line as possible for a natural appearance.
– **Lash Curling**: Curling my lashes is a must. It opens up my eyes instantly and makes them look more awake. I do this prior to any primer or mascara application to avoid damaging my lashes.
– **Fiber Mascara**: If false lashes aren’t an option, fiber mascara is my secret weapon. The tiny fibers build on my natural lashes, adding dramatic length with each coat.
Carefully selected and applied, these lash techniques ensure that my eyes remain captivating and sophisticated, whether for a daytime event or an opulent evening gala.
Eyebrow Mastery: Crafting the Perfect Arches
Innovative Techniques in Eyebrow Shaping
Eyebrows are a crucial facet of facial symmetry and expression. They frame the face and can significantly affect how other facial features are perceived. My approach to creating the perfect eyebrow shape involves several innovative techniques:
– **Assessing Natural Shape**: I begin by examining the natural curvature and density of my brows. It’s important to work with one’s natural shape rather than attempting to create something entirely different.
– **Mapping Out Points**: I identify the key points of my eyebrows: where they should start, arch, and end. This is done in relation to the nose and the outer corner of the eye to ensure symmetry.
– **Trimming and Tweezing**: Using precise eyebrow scissors and tweezers, I trim any excess length and tweeze stray hairs, being careful not to over-pluck.
– **Defining the Arch**: By focusing tweezing beneath the highest part of the brow arch, I enhance the natural arch without making it appear too sharp or artificial.
– **Filling Sparse Areas**: Employing a fine-tipped eyebrow pencil or a pomade, I fill in any sparse areas with light, hair-like strokes, blending as I go to maintain naturalism.
I prefer not to over-sculpt, as retaining some natural fullness contributes to a more youthful and relaxed appearance.
Products for Natural and Bold Brow Looks
The choice of eyebrow products is paramount in achieving the desired brow look, whether I want something natural for daytime wear or a bolder statement for evening. Here’s how I select and use these products:
– **For a Natural Look**: I choose a tinted brow gel that corresponds closely with my hair color. The gel tames unruly hairs while providing a subtle tint and fullness. It’s perfect for a quick, no-fuss application.
– **For a Bold Look**: When more drama is required, I opt for a brow pomade or a highly pigmented pencil. I carefully outline my brows to create a defined shape, then fill them in with the product, using an angled brush for precision.
– **Maintaining Precision**: Whatever the product, I ensure that the edges of my brows are clean and well-defined by using a small amount of concealer on a flat brush to trace around the brows and clean up any smudges.
– **Setting the Look**: Lastly, I set my eyebrows with a clear brow gel to keep hairs in place all day or night.
Depending on my outfit and the occasion, I might adjust the intensity of my brows, but the fundamentals remain the same. Regular maintenance and the right products can elevate any look, giving me not just the power of expression but also the confidence that comes with knowing my eyebrows are flawlessly crafted.
Lips that Enchant: The Power of Precision
Precision Lip Liner Techniques
Creating the perfect lip look is as much an art as it is a science. It requires a careful balance of precision and creativity. Much like the eyebrows, the lips are a central feature of our facial expression and play a critical role in symmetry and aesthetics. Here’s my step-by-step process for precision lip lining:
– **Choosing the Right Liner**: I always ensure that my lip liner closely matches my lipstick or is a shade darker to create natural-looking depth. The perfect lip liner is not too soft but not too firm, allowing for a blendable yet precise application.
– **Defining the Cupid’s Bow**: I start at the peak of my cupid’s bow, using an ‘X’ shape as a guideline. This helps in maintaining symmetry and serves as a starting point for the rest of the liner application.
– **Outlining the Lips**: I proceed to outline the edges of my lips, keeping the line crisp and smooth. To prevent any harsh lines, I use a light hand and build up the intensity gradually.
– **Filling in the Edges**: Once the perimeter of my lips is defined, I slightly fill in the corners and the outer portions of my lips with the liner to add dimension and make the lipstick last longer.
– **Blending into Lipstick**: After applying my chosen lipstick, I run a clean lip brush along the edges of my lips to blend the liner and lipstick seamlessly.
With these techniques, my lips are precisely defined, creating a polished and potent look that complements my overall makeup.
Discovering the Perfect Luxe Lip Color
The journey to finding the ideal lipstick shade that resonates with my style and enhances my natural lip color is always exhilarating. Here’s how I navigate the sea of options:
– **Analyzing My Natural Lip Color**: I carefully consider my natural lip color to choose a lipstick that either matches or provides a complimentary contrast.
– **Considering the Occasion**: Whether I need a subtle hue for daytime or a striking shade for evening events, the context in which I will wear the lipstick influences my choice significantly.
– **Understanding Undertones**: I identify the undertones of my skin – be it cool, warm, or neutral – to pick a lip color that flatters my complexion.
– **Quality Over Quantity**: I invest in high-quality lipsticks that offer rich pigmentation, long wear, and moisturizing benefits. A luxurious formula not only looks better but also feels more comfortable on the lips.
– **Trying Before Buying**: Whenever possible, I test the lipstick on my lips rather than swatching on my hand. This gives me a true sense of the color and its compatibility with my features.
By meticulously selecting the right lip liner technique and the perfect luxe lip color, I empower my lips to speak volumes without uttering a word. Each step in this process ensures my lips are not just seen but remembered, striking the right note of allure and sophistication.
Set and Refresh: Longevity for Your Luxe Look
Setting Sprays and Powders to Lock in Your Look
To ensure the longevity of the impeccable eyebrows and makeup I’ve crafted, using the right setting products is a must. These are the steps I follow to make sure my look stays in place:
– **Selecting the Right Setting Spray**: I choose a setting spray that not only holds my makeup in place but also offers hydration, which is vital for a dewy, fresh-faced look. Spritzing it in an ‘X’ and ‘T’ formation covers my entire face.
– **Choosing a Finishing Powder**: If I’m going for a matte finish, I lightly dust a translucent setting powder over my T-zone. This step helps to control shine throughout the day.
– **Layering Products Carefully**: To set my brows, I use a clear brow gel after filling them in. The gel acts as a seal for the pigment and keeps the hairs neatly aligned.
– **Avoiding Over-application**: It’s key not to douse my face with product. A light mist of setting spray and a soft sweep of powder usually suffice to maintain my look without a caked-on appearance.
By attentively selecting and applying setting sprays and powders, my makeup is preserved through various conditions, from sun exposure to a night out dancing.
Makeup Refresh Tips for All-Day Elegance
Throughout the day, makeup may require a little touch-up to stay fresh. Here is how I keep my makeup looking pristine:
– **Blotting Papers for Oil Control**: I carry blotting papers to dab away excess oil without disturbing my makeup. A gentle press on the oily areas and I’m good as new.
– **Hydrating Face Mist**: I refresh my face with a light, hydrating mist. It not only rejuvenates my skin but also helps to subtly merge any makeup that’s begun to settle or separate.
– **Touch-up Essentials**: For any areas that need a little extra attention, I keep a compact powder, a mini brow pencil, and a lipstick in my purse. Quick fixes are effortless with these staples on hand.
– **Lip Care**: Throughout the day, I maintain my lip color by applying a layer of balm before adding another swipe of lipstick. This keeps my lips from drying out and the color vibrant.
– **Mindful Activity**: I stay conscious of activities that may affect my makeup — I avoid touching my face, and if I foresee a busy day ahead, wearing water-resistant products can be a game-changer.
With these refresh techniques, no matter how long my day is or what challenges it may bring, I can quickly and easily revive my look, ensuring I’m always presenting the best version of myself.
Conclusion and Final Thoughts
Summarizing Revolutionary Makeup Techniques
Reflecting on the innovative techniques that have revolutionized my makeup routine, it’s clear they are pivotal in maintaining a luxurious look from day to night. Key takeaways include:
– The importance of **choosing the right setting spray** according to your skin’s needs cannot be overstated. A good setting spray ensures longevity and adds an extra layer of hydration.
– Recognizing that **applying the right amount** of product is just as crucial as the product itself. Over-application can lead to a less natural look and can affect the makeup’s staying power.
– **Setting powders** play a dual role, perfecting the look by giving a matte finish and keeping shine at bay, which is essential for maintaining a polished appearance.
– **Brow gels** are indispensable for locking eyebrows in place, making them one of the most reliable products in my kit.
This meticulous approach to applying and setting makeup not only enhances durability but also boosts my confidence, knowing that my appearance will remain flawless.
Embracing the New Era of Luxe Looks
These methods exemplify a modern standard for esthetics, where beauty routines are designed for endurance as much as they are for glamour. The ability to showcase a refined and high-end look throughout any event or challenge is truly empowering. As I incorporate these strategies:
– **Convenience has improved**: Keeping blotting papers and a few touch-up products on hand allows for quick fixes that go a long way in keeping my makeup fresh.
– **Awareness of my daily habits**: Being mindful of my actions, such as avoiding unnecessary face touching, works wonders in preserving my look.
– **Adaptability**: Adjusting my makeup routine to include products like water-resistant formulations gives me flexibility and ease of mind in unpredictable situations.
Embracing these new-era makeup strategies assures that my esteemed appearance stands the test of time and activity. It is a testimony to the avant-garde techniques now integral in crafting daily, luxe looks that last. Through careful application, setting, and easy mid-day refreshers, my visage embodies a timeless quality that stands up to the fast-paced demands of my lifestyle. These refined makeup rituals are now the cornerstone of maintaining a composed and magnificent presence no matter what the day holds.
